Patel Gaming Projects
WWII Soldier Assets
Time Duration: 14/03/2023 - 17/04/2023
These humanoid models will be AI ally soldiers that will have some animations such as walk cycles, whereas other humanoid models will be dead body props with missing body parts and blooding, with both ally and enemy clothes.
Research
I started by finding some low poly bodies models to use based on how I want to design my characters as well as the models of soldiers based on the clothing style.


Modelling Process
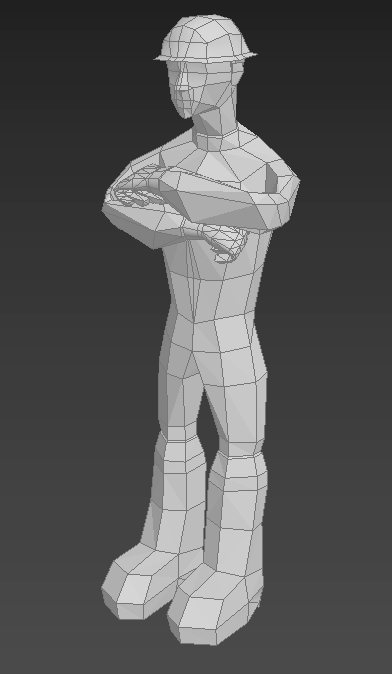
I chose to use 3ds Max for creating the models of the soldiers as well as creating their poses & animations.
1) I started with a standard primitive box object that I’ve mirrored as an instance, then reshaping the model by repositing, connecting & deleting the faces, lines & pivot points using the target weld and extruding tool.

2) Next, I extruded the top faces of the head, extruded some of the bottom faces that have already been extruded after using the quick slice tool, and deleted some unnecessary lines and faces whilst repositioning the lines and pivots points to create the helmet of the solider.

3) I edited the shape of the soldier’s body by using the Extrude and QuickSlice tool to create some extra lines, as well as using the move tool to reposition some of them.
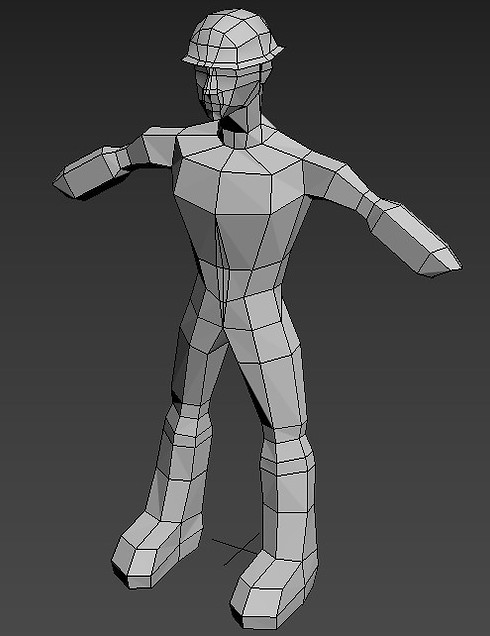

4) Next, I imported a hand model from a different character asset to position on to the soldier’s wrist, and repositioned and added some extra pivot points on the wrist by QuickSlice & move tool using the of my characters body to match the hand.
5) Before mirroring the hand model, I had to delete the 3 fingers on the model to create 4 fingers by using the QuickSlice, Bridge, Extrude, Connect, & Tessellate tools to make each of them, and reshaped some of the lines & pivot points of each finger with the move and scale tool.
.jpg)
.jpg)

6) I had to extrude some of the faces from the body to represent the thickness of the characters clothing, and later I had to delete the Instance mirror models of the object and mirrored them as copies, allowing me to use the Attach tool to merge the objects into one model & use the Weld tool to merge the some of the pivot points.
7) I had to edit the UVW map positioning before rendering the UVW map as a PNG file to create the materials later.

.jpg)
.jpg)
.jpg)
.jpg)
8) To create them with missing limbs I had to add another editable poly using the Modifier List by deleting some faces, using the bridge tool to create some extra faces, and adding an Unwrap UVW to reediting & save the UVW maps, before exporting them as separate files.
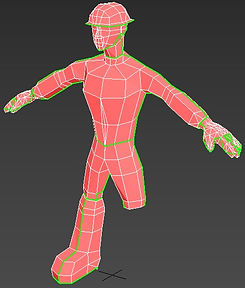
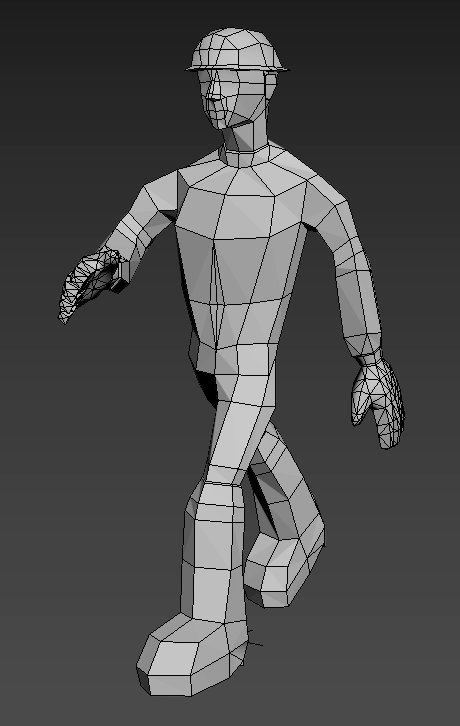
Animation Process
This involves me using a skeleton to help with rigging to my character to create the animations.

1) I started by adding a biped skeleton model to the soldier model by editing and repositioning each part of the skeleton links, before going to selecting “Skin” on Modifier List on the soldier model and adding all the biped bones.
2) Next, I had to moving and rotating the bones of the biped skeletons to save as individual frames to create two animations for the character.
.jpg)
.jpg)
3) I was able to add the same skeleton to the other soldier models with lost limbs by going to File > Import > Merge to select the same skeleton from the Scene Explorer first Soldier model file, and repeating the same process on connecting the skeleton to the character model.
4) Finally, I was able to create some dead poses for the soldiers with some no limbs before exporting them.
.jpg)
.jpg)
Creating Material Maps
I used Photoshop to only create one material map for each of the model based on ally and enemy.
1) I started by using the Pencil Tool & Fill Tool to fill some of the faces of the head, boots, & hands to white, and used the tools again to fill of the clothing to an army camo green for represent the ally soldiers. I duplicated the layer to use Fill Tool to change the army camo green clothing to army camo grey to represent the enemy soldiers.
.jpg)
.jpg)
.jpg)
.jpg)
2) Next, I duplicated the regular soldier map layers to use the Erase Tool to erase some of the sections of the maps, and used the pencil tool create the blood sections on a new layer before merging both layers.
3) I choose to reuse the same method for the No Arm Soldier maps to create the No Leg Soldier maps.
.jpg)
.jpg)
.jpg)
.jpg)
.jpg)
.jpg)
4) Finally, I used the Paint tool to create some blood effects, that I duplicated and merged each one induvial with the No Arm and No Leg Soldier maps, before exporting the maps.