
Patel Gaming Projects
Futuristic Wall Safe
Time Duration: 20/10/2023 - 23/10/2023
This will used in some of the levels of the game for holding valuable items for the thief to try to access and steal.
Research
Here is a set of images and links to models of safes that are old, modern or futurist. I was also able to find some access panels that might be of use to keep it cyberpunk themed.


Specifications
These are the specifications for the safe I’ll be using.
-
Width: 55 cm
-
Height: 30 cm
-
Depth: 40 cm
-
Door Width: 46 cm
-
Door Height: 26 cm
-
Door Depth: 1.25 cm
-
Material: Black Steel
-
Material Thickness: 1.25 cm
-
One Shelf Inside
-
Shelf Thickness: 1.5 cm
-
Hand Scanner Size: 18 cm width × 24 cm height × 1 cm depth
Sketches
These are a few ideas on how I should design the front part of the safe based on the door design and the lock that opens it. I chose not to create sketches of the safe due to the how I’ve got the measurements.

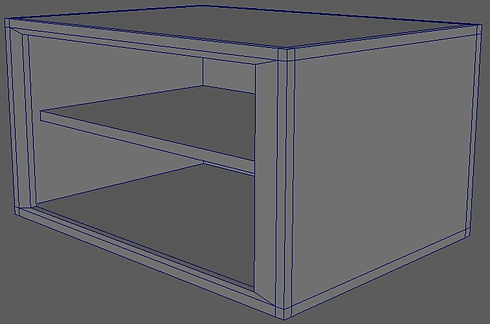
Modelling Process
1) I started using the multi-cut tool to create extra faces on the box model and then I extruded some of the faces.


2) Next, I did the same method for the front edges to create a hole for the position of the door.
3) I merged a private box model that’s in 54 cm × 35 cm wide and 1.5 cm thick to the safe model.

4) I create the door for the safe by using the measurements of the door I create the private object and had to extrude it by 1.5cm and add a bevel to the corners of object for the inside.
5) I used the multi-cut tool and extrude tool to create one half of the hinges on the safe.


6) For creating the hand scanner, I merged another private object to the door object and bevelled some of the lines object.
7) I extruded some of the side faces to 7.5 cm from a primitive cylinder (5 cm diameter × 1 cm height) to create the handle for the door of the safe.


8) I started by duplicating a primitive cylinder object (1.25 cm diameter and 5 cm height) twice to make the locking bolts. I was able to duplicate the objects to make the holes in the door the position of the locking bolts.
9) I then mirrored a private cube object and merged it to the door model the create the other half of the hinges for the safe. I also created & deleted some unnecessary lines and pivot points, as well as grouped the handle and locking bolts to the door model to animate later.


10) Finally, I edited the UV map before starting to create the animations.
Animation Process
For creating the animations, I simply just had to save some separate files to create the two animated models and one still model. For the still model to show the safe is open, I only had to change the position of the locking bolts and rotate the door and handle models. The gif’s showing my animation of the safe opening and closing are both 48 frames and are just the locking bolts position changing, and of the rotating of the door & safe handle.
.jpg)
Creating Material Maps


I reused Adobe Substance 3D Painter to create the material maps for the Futuristic Wall Safe. I reused the same methods and neon blue material that I used for the Ninjatō material.
Due to the repeated error with Substance 3D Painter when exporting the material maps, so I re-used Photoshop to create two emission maps by using fill and shape tool.


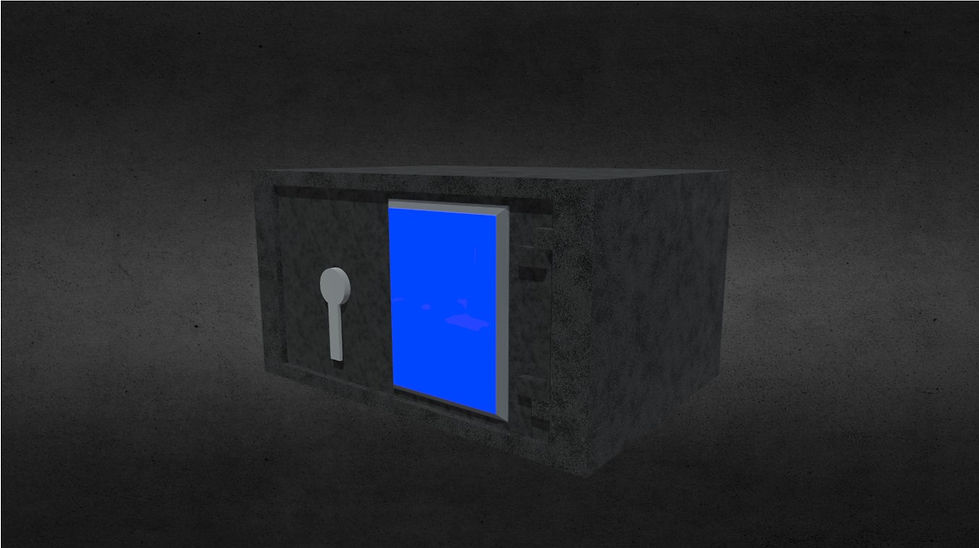
Final Model
This is finished version of the asset that has been add to my ArtStation account, it only features the blue albedo and emission map as well as the animations.
Reflection on Asset Process
The improvements I would have done with making the wall safe:
-
Added a handprint symbol on the access panel for the material design.
-
Created different maps for the access panel of the model such as a number panel.